Mold on your outdoor patio, deck, or walkway is more than just unsightly; it can pose health risks. But tackling this stubborn growth doesn’t require harsh chemicals or expensive equipment. A good scrub brush, some elbow grease, and the right technique can often do the trick. This guide walks you through the process, step-by-step, so you can reclaim your outdoor space and enjoy it mold-free.
Assessing the Mold Situation

Before you start scrubbing, take a moment to assess the extent of the mold infestation. Is it a small patch, or is it covering a large area? Knowing the size will help you determine the supplies you’ll need and how long the job will take. Also, identify the type of surface you’re cleaning. Porous materials like wood or brick will require a gentler approach than non-porous surfaces like concrete or tile.
Important note: If you are dealing with a large area of mold, or if you suspect black mold (which can be hazardous), it’s best to consult a professional mold remediation service. They have the expertise and equipment to handle significant infestations safely and effectively.
Gathering Your Supplies

Cleaning mold effectively requires the right tools. Here’s what you’ll need:
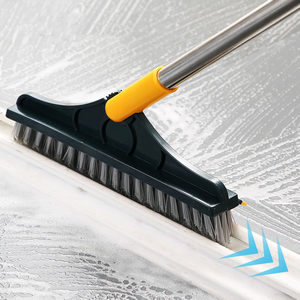
- A sturdy scrub brush: Choose a brush with stiff bristles suitable for outdoor use. A deck brush with a long handle is ideal for larger areas, allowing you to avoid bending over excessively. For smaller, more detailed areas, a smaller handheld scrub brush might be more manageable.
- Cleaning solution: For most outdoor mold, a simple solution of water and bleach works well. Mix 1 part bleach to 10 parts water (always follow bleach product instructions). You can also use a commercially available mold cleaner, but make sure it’s appropriate for the surface you’re cleaning. Always test any cleaning solution on a small, inconspicuous area first to ensure it doesn’t damage the surface.
- Bucket: A large bucket is necessary to hold your cleaning solution.
- Garden hose or pressure washer (optional): A garden hose is useful for rinsing the surface before and after scrubbing. A pressure washer can be helpful for tougher mold and larger areas, but use caution to avoid damaging the surface. Always test on a small area first.
- Safety gear: Protect yourself by wearing gloves, eye protection, and old clothes. Mold spores can be irritating, and bleach is a harsh chemical.
- Scrubbing Pad or Sponge (Optional): For delicate surfaces, a softer scrubbing pad or sponge can be used in conjunction with the scrub brush.
The Cleaning Process: Step-by-Step

- Preparation: Clear the area of any furniture, plants, or other obstacles. Sweep or vacuum the area to remove loose debris. If using a pressure washer, familiarize yourself with its operation and safety procedures.
- Pre-rinse (Optional): Rinse the surface with a garden hose to remove loose dirt and mold. This will make the scrubbing process more effective.
- Apply the cleaning solution: Pour your cleaning solution into the bucket. Dip your scrub brush into the solution and begin scrubbing. Work in small sections, overlapping each stroke to ensure complete coverage. For stubborn mold, let the solution sit for a few minutes before scrubbing.
- Scrubbing: Apply firm, even pressure while scrubbing. Don’t scrub too hard, especially on delicate surfaces. Replace the cleaning solution as it gets dirty.
- Rinse: Thoroughly rinse the area with a garden hose or pressure washer. Ensure all traces of the cleaning solution are removed. Let the surface dry completely.
- Post-Cleaning Inspection: Inspect the cleaned area carefully. If any mold remains, repeat the process.
Tips for Effective Mold Removal
- Work on a cloudy day: Direct sunlight can cause the cleaning solution to dry too quickly, making scrubbing less effective.
- Ventilation: Ensure good ventilation during the cleaning process to reduce the inhalation of mold spores and bleach fumes.
- Frequency: Regular cleaning is key to preventing mold growth. Clean your outdoor floors regularly, especially after periods of rain or high humidity.
- Prevention: Address any sources of moisture that could contribute to mold growth, such as leaky gutters or poor drainage.
- Surface Specific Cleaning: Different materials react differently to cleaning agents. Research appropriate cleaning methods for your specific outdoor flooring material before proceeding.
Dealing with Stubborn Mold
If the mold is particularly stubborn, you may need to repeat the cleaning process or try a stronger cleaning solution. In some cases, a pressure washer may be necessary, but use it cautiously to avoid damaging the surface. Always test any new cleaning solution on an inconspicuous area first.
Remember, safety first! Always wear appropriate safety gear and work in a well-ventilated area. If you are unsure about tackling a mold problem yourself, don’t hesitate to contact a professional mold remediation service.
With a little effort and the right techniques, you can effectively remove mold from your outdoor floors and restore their beauty and functionality. Enjoy your clean and mold-free outdoor space!


